Drawing tools
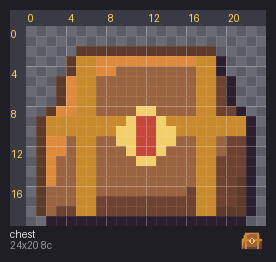
You'll draw a treasure chest without touching a single pixel by hand: eleven pxart commands, from an empty frame to a shaded, outlined chest with a gem on its lock.
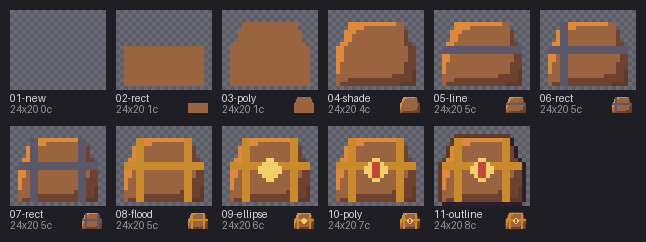
The idea
In 01 · Format basics you drew by typing letters into a grid. pxart can
also draw for you: a rectangle, a line, a filled shape, shading, an outline. Each command
takes the .px file, the letter (key) to paint with, and some positions, and it changes
the file in place. For example, pxart rect chest.px b 2,9,20,10 --fill paints a filled
rectangle of b (light wood) into chest.px.
The colors come from palette.px, and the whole script is
draw.sh: one command per line, the same ones as the steps below.
Before you start
From this folder, copy just the source files into a new folder of your own and go there. The commands below then make every output fresh, and print exactly what's shown here:
mkdir -p ~/pxart-04
cp draw.sh palette.px ~/pxart-04/
cd ~/pxart-04
~ is your home folder, and -p keeps mkdir quiet if the folder is already there.
The examples README says how to make pxart a command you can type.
Positions are x,y in pixels, counted from 0,0 at the top-left corner; x grows to the right and y grows down. The pictures below have rulers so you can check them.
To look at your chest after any step, run the command from
the last section and open chest.preview.png. That's how the
pictures below were made.
Step 1: Start an empty frame
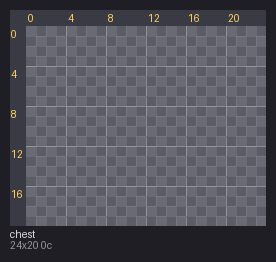
pxart new chest.px --size 24x20 --palette palette.pxnew chest.pxmakes a new file.--size 24x20makes its one frame 24 pixels wide and 20 tall, all empty (.).--palette palette.pxadds the line@palette palette.px, so the chest uses those colors.
Step 2: The body
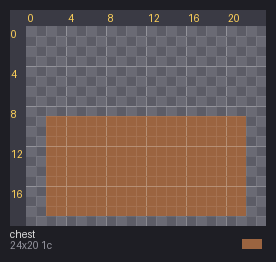
pxart rect chest.px b 2,9,20,10 --fillrect draws a rectangle given as x,y,w,h: its top-left corner at 2,9, then 20 wide and
10 tall. Without --fill you'd get only its border.
Step 3: The lid
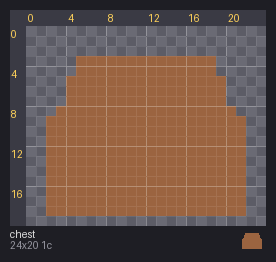
pxart poly chest.px b 3,9 5,3 18,3 20,9 --fillpoly draws a shape through a list of corners (x,y each), joined back to the first.
These four make a lid that's narrower at the top.
Step 4: Shade the wood
Flat wood looks like cardboard. shade repaints a material in a range of tones, light
where it faces the light and dark where it faces away:
pxart shade chest.px --ramp Bhbo --keys b --light nw --strength 3--ramp Bhbois the tones to use, darkest first:Bdark brown,h,b(the wood itself, in the middle), theno, a light orange.--keys brepaints only thebpixels.--light nwputs the light at the top-left (north-west).--strength 3lets the shading reach 3 pixels in from each edge.
It prints how many pixels got each tone:
changed 100 px: 7->B, 57->h, 36->o; wrote chest.px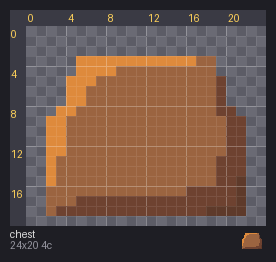
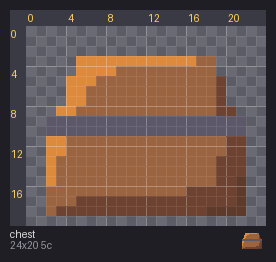
Step 5: The band across the lid
pxart line chest.px G 2,9 21,9 --width 2line draws from one point to another, here straight across at y=9, in G (dark iron).
--width 2 makes it 2 pixels thick.
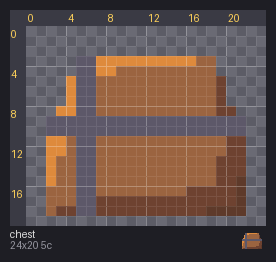
Step 6: The left strap
pxart rect chest.px G 5,3,2,16 --fillThe same rect as Step 2: 2 wide and 16 tall, from the top of the lid to the bottom.
Step 7: The right strap
pxart rect chest.px G 17,3,2,16 --fill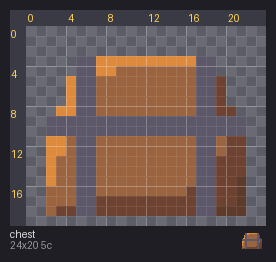
Step 8: Turn the iron gold
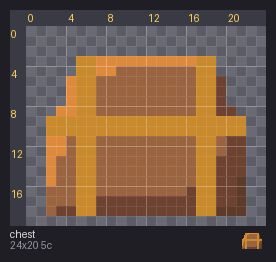
The band and both straps touch, so they're one connected patch of G. flood repaints
a whole connected patch at once, like a paint bucket:
pxart flood chest.px Y 5,155,15 is a pixel on the left strap. Every G pixel connected to it becomes Y (gold).
Step 9: The lock
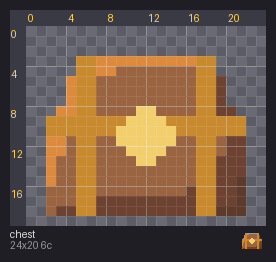
pxart ellipse chest.px y --box 9,8,6,6 --fillellipse draws a round shape that fits in a box: --box 9,8,6,6 is x,y,w,h like
rect's, so this is a 6x6 circle of y (light gold).
Step 10: The gem
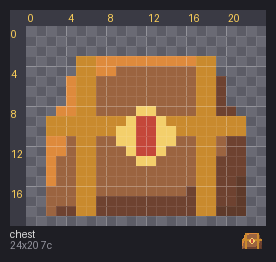
pxart poly chest.px r 11,9 12,9 12,12 11,12 --fillA small poly: four corners that make a 2x4 block of r (red) in the lock.
Step 11: The outline
pxart outline chest.px --key k --lit Boutline draws a 1-pixel line around the whole shape, in the empty pixels just outside
it.
--key kdraws it ink, the darkest color.--lit BusesB(dark brown) instead on the sides that face the light, the top and the left. A softer outline there makes the chest look lit.
changed 66 px: 36->k, 30->B; wrote chest.px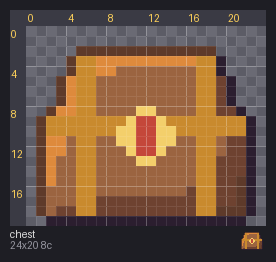
The finished chest
Render it once more, big, and save it at its real size too:
pxart render chest.px --scale 10 -o chest.preview.png --png--scale 10 draws each pixel as a 10x10 block, with a grid and rulers. --png also saves
the chest at its real size, 24x20, as chest.png: the file a game would use.

Try it yourself
- A bigger lock. In Step 9, use
--box 8,7,8,8for an 8x8 lock around the same middle; the gem in Step 10 still sits in its center. - Light from the other side. Use
--light nein Step 4 and in Step 11 (pxart outline chest.px --key k --lit B --light ne), and the chest is lit from the top-right. - Try before you commit. At Step 4, run the
shadecommand with--preview try.pngon the end first: it draws what shading would do intotry.pngand leaveschest.pxalone. Then run it without--previewto shade for real.
Commands used
pxart new FILE --size WxH --palette P.px: an empty frame.pxart help newpxart rect FILE KEY x,y,w,h [--fill]: a rectangle.pxart help rectpxart poly FILE KEY x,y x,y ... [--fill]: a shape through corner points.pxart line FILE KEY x0,y0 x1,y1 [--width N]: a line.pxart ellipse FILE KEY --box x,y,w,h [--fill]: a circle or oval in a box.pxart flood FILE KEY x,y: repaint the connected patch at x,y.pxart shade FILE --ramp KEYS --keys KEYS --light DIR: shade a material.pxart outline FILE --key K [--lit L]: outline the shape.
pxart help COMMAND has the details of each. The Commands section
of the main README covers all of them.
examples/04-drawing/README.md in the repository.Edit on GitHub